
Are we there yet? Can't you just remember how when you were a kid it seemed as though Christmas would never, I mean NEVER, arrive? I swear, counting the days until Christmas- several times a day- was how my Zippy learned to count.

Here's a Countdown Calendar project to get your little Santa's Helpers in on the act. This can be as simple or as elaborate as you would like for it to be.

Start out with a basic "wood" clipboard. These are some kind of compressed wood product and hold the glue, paint, sparkles, etc. much better than the plastic ones. I got mine from Office Depot and they come in 2-packs. Nice if you have more than one munchkin type person at your house. Some clipboards have the screws to remove the clip do-hickey at the top but I wasn't able to find any of those. So we'll work around it.

You'll also need some of this super fun chalkboard paint. How fun is this stuff!!

Mark out a 7.5 inch square on the clipboard.

Tape off the square with painters tape and paint inside the square with the chalkboard paint. If you can, use the painters tape for delicate surfaces.
You'll need to use two coats in order to get good coverage. Paint one coat in one direction, let it dry, and paint the second coat in the other direction.

Make your stroke nice and smooth and even, as on the left side above, not swirly like on the right side of the clipboard. You know that, of course, but when working with kids or non-crafter adults (like I do) you'll want to mention it.

Once the paint is dry, carefully peel off the painters tape.

Use a pencil to mark out your grid. The lines need to be 1.5 inches apart in order to get your 5 x 5 grid.

Use a paint marker to draw your grid.

Draw all of the lines in one direction first, letting them dry completely before you do the perpendicular lines so that you don't get streaking and smudging.

Here's another hint- once you draw a line with the paint marker, tilt the ruler up and away from the board instead of sliding it. You may also want to consider wiping the edge of the ruler off with a wipe or damp paper towel before you lay it back down on the clipboard for the next line. The paint markers dry fairly quickly.

After I started this clipboard, I decided that I wanted the edges around the chalkboard part to be a color. That's because ...

... I was zero-thrilled with my first run at this project.

So I carefully taped off the chalkboard area and painted the outer edges.

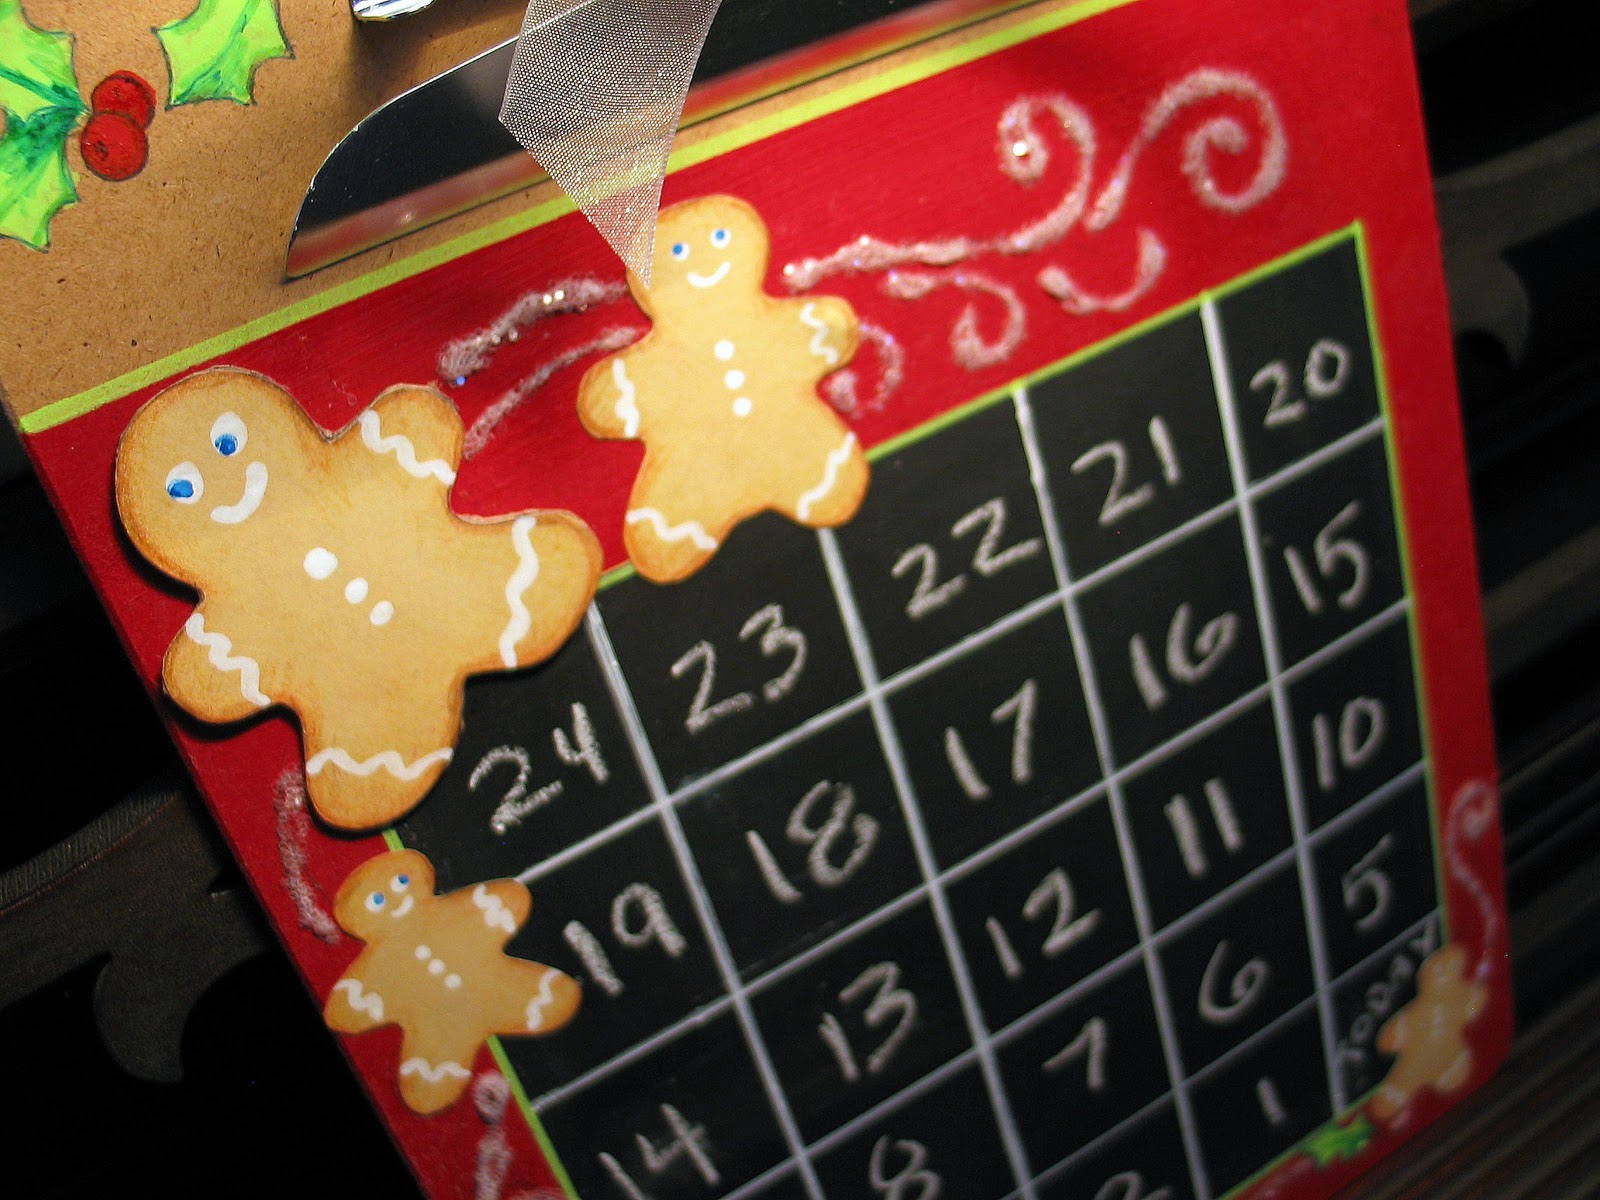
Next I drew some gingerbread men in a couple of sizes on tan scrapbook paper, shaded them with colored pencils, and painted on the frosting with paint markers.

Then I added some swirls with white glue and glitter and drew in a little Cardinal friend with paint markers and Sharpie.

Glue on the gingerbread fellas once the glitter-glue swirls have dried.

Finally, add a bow.
Write in the countdown days with chalk. We have a big debate at our house every year about which day is first, which day is last so I started on the Eve as one day left since that day can feel like the longest day of the month when you're a kid who's been forbidden from shaking any more presents.

Stash the chalk in the clip do-hickey.
You can erase the days or cross them out with the chalk.

I did make another countdown calendar, going back to the non-painted outer edges. I used scrapbook paper to add a colored band across the top and was originally going to cut out CriCut letters for a title --"Days To Go" or something. But the felt presents and tree, which came from Michael's, were so cute I just went with them and added some swirls with glitter glue. Not lovin' this one either but it's just so fun to play around.
So there you have it! Not too hard at all. You could use the clip part at the top to post notes such as...
"Stop poking at the presents."
"Clean your room or no presents."
"There better be some diamonds under that tree."
So hang in there, we're getting closer. Have fun and sing a few carols today.
Next time- Awesome Fudge!


Thanks for this - what a great idea!
ReplyDelete