Showing posts with label recipes. Show all posts

Wednesday, October 24, 2012

Crock Pot Season Approaches

Tomato, Basil & Parmesan Soup


Yes, that's right, it's coming. Crockpot Season, otherwise known to some people as Autumn. I just love my big red crock pot and use it pretty regularly in the cooler/colder seasons. I generally prefer not to have appliances sitting out on the counters- it's just a funny thing with me. I put away the toaster, the coffee pot, the mixer, cutting boards, spoon rests- any and all appliances. No wooden knife blocks or canisters. I do have a really neat Ulu in a stand from Alaska, but that's it. But when the temperatures fall, there are stretches of several days when my crock pot never gets put away. We just wash it and let it live on the counter because it's going to be called into duty very shortly. The unspoken expectation around our house is that whichever one of us gets home first starts dinner. Since we both have a 45-minute commute (in opposite directions), we don't usually all show up at the house together until 6:00pm or later. Don't feel like cooking because there are still chores, homework, and Doctor Who episodes on Netflix to get through before bedtime. So crockpot to the rescue! And this recipe has all the hallmarks of becoming classic comfort food at our house.


I found this recipe on Pinterest but it comes from the blog We Pass The Time of Day To Forget How Time Passes, who found it at 365 Days of Slow Cooking, where you can find a stove top version of the recipe. So here we go-


Tomato, Basil, & Parmesan Soup

2 (14 oz) cans diced tomatoes, with juice

1 cup finely diced celery
1 cup finely diced carrots
1 cup finely diced onions
1 tsp dried oregano or 1 T fresh oregano
1 T dried basil or 1/4 cup fresh basil
4 cups chicken broth
½ bay leaf
½ cup flour
1 cup Parmesan cheese
½ cup butter
2 cups half and half, warmed*
1 tsp salt

¼ tsp black pepper


1. Add tomatoes, celery, carrots, chicken broth, onions, oregano, basil, and bay leaf to a large slow cooker.

2. Cover and cook on LOW for 5-7 hours, until flavors are blended and vegetables are soft.

3. About 30 minutes before serving prepare a roux. Melt butter over low heat in a skillet and add flour. Stir constantly with a whisk for 5-7 minutes. Slowly stir in 1 cup hot soup. Add another 3 cups and stir until smooth. Add all back into the slow cooker. Stir and add the Parmesan cheese, warmed half and half, salt and pepper. Add additional basil and oregano if needed (the slow cooker does a number on spices and they get bland over time, so don't be afraid to always season to taste at the end). **

4. Cover and cook on LOW for another 30 minutes or so until ready to serve.

* The recipe I got has a note that maybe 1 1/2 cups of Half & Half is enough but, nah...
** I actually like to add most of my spices maybe 30 minutes before serving for this very reason. And fresh trumps dried every time.


This is one of those soups that is wonderful with a hearty, whole grain bread along side. We have found that buttered Salt-Rising Bread goes exceptionally well with it also. It also goes well with chenille socks (stay-at-home-socks), fleece jammies, a snugly fur blanket, and a loved one to cozy up with a loved with one with whom you can snuggle. Sorry, fellow Grammar Nazis.


In closing, our butterfly for today comes from Tony at Northrup Photography. This beauty is called a Banded Orange Heliconians (Dryadula phaetusa). It is also called an Orange Tiger Butterfly or simply a Banded Orange. The sole representative of its genus (Drysdula), the Banded Orange Heliconian is native from Brazil to central Mexico, and in summer it can be found rarely as far north as central Kansas.


Thanks for visiting--- see ya again.


Monday, April 9, 2012

Eating: Good Old Fashioned Chow


Salt-rising bread and tomato gravy. If you've ever had either one, that's about all that needs to be said. That and "Oh yum, where can I get some?" But for the uninitiated butterflies out there, let's explore this little bit of heaven from the kitchen.


Salt-rising bread doesn't get the usual high dome that most breads have.


Let's start with the bread. I was introduced to salt rising bread by my husband's family. Big 'Un's grandmother used to make this bread and there were plenty of wise cracks about salt rising bread. Mention it and they all rolled their eyes or backed away, saying things like "Oh my, not that." They told me that basically salt rising bread stinks. Like a baby diaper or old gym socks. Grandma apparently made salt rising bread very frequently and had people lined up outside her door wanting to buy it but, oddly, there was never any around my mother-in-law's home and I never had it until Grandma gave me a loaf- gave it to me, not my husband. But a funny thing happened when none of his siblings were around- my husband chowed down on MY loaf of bread. And yes, a distinctive odor floated up out of the toaster. Like the way, yes, the odor floats up out of a baby's diaper. When the starter for this bread is, um, starting is when you get a nice dose of the aroma but while toasting, the aroma is distinct but not over-powering. But the flavor.... oh so good. Nutty, cheesy, fine grained and dense... very delicious.


Sadly, Grandma passed away- at the fabulous age of 98- and the future of my salt-rising bread consumption looked bleak. Until Rising Creek Bakery & Cafe opened their cute little doors. This is the place that turned me on to Carrot Soup. Truthfully, I've never had anything from this bakery that wasn't divine (oh the Turkey & Cranberry Sandwich!). If you're ever driving down I-79 South from Pittsburgh, just about to enter West Virginia, it's worth getting off at Mt Morris to grab a bite to eat. Anyway, now they are my Salt-Rising bread source. Last fall, Big 'Un and I snuck down to the bakery for breakfast one morning while Zippy was at a sleep-over. Tomato gravy over salt-rising bread was on the menu that morning and since I had never heard of tomato gravy, much less eaten it, and it came over salt-rising bread that was, naturally, what I had for breakfast.


Bread at Rising Creek, waiting for me. Image via Post-Gazette.


Salt-rising bread was apparently first made by settlers in the Appalachian Mountains in the early 1800's. It is actually mentioned in the Laura Ingalls Wilder book The Little House in the Big Woods. I've seen a couple places trying to pass it off as an Amish bread and while I'm sure the Amish made/make this bread I wouldn't bet they invented it, mainly because it is fairly wide-spread through-out Appalachia. Today, salt-rising bread is called an artisan bread, but it was originally just bread- what you made with what you had in order to feed your family. Salt is not the ingredient that causes this yeast-free bread to rise but rather a fermentation process that uses naturally occurring bacteria. I heard it said that if you can't get this bread to rise, maybe your kitchen is too clean! Commercial yeast was not available until around 1860 or so. Don't worry, no one has ever been harmed by the bacteria in this bread, unless it is what has caused you to eat waaaaaay too much of it. Then you're just full, not harmed. Also, the salt content of this bread is the same as any bread. It is thought that warmed rock salt was used to keep the starter warm (hence the name) because it is very important to keep the temperature at the right spot for the dough to rise. I am not an expert on salt-rising bread, at least not in making it. I'm pretty close to a professional, however, when it comes to eating it. Click over to the SRB section of Rising Creek Bakery for information about the history of this neat bread as well as info on how to make it and how to order bread. Yes, the ladies at Rising Creek will mail bread to you, no matter where you live. You owe it to yourself to try it. This bread is best eaten toasted.


So, now, for the gravy. Delicious! Of course I went straight to my computer to search for Tomato Gravy recipes. The recipe below is one that I've cobbled together from the many that I've tried, though I think it's mostly a basic recipe. As with anything, there are variations galore, some fancy, some weird, but this is the way I generally make tomato gravy.


Ingredients:
2-3 cloves of garlic (to your preferences but I  like 2 cloves)
1 medium-size onion, finely chopped
2 tablespoons olive oil
4 large tomatoes, chopped (medium coarse, not too small)
1/2 cup whipping cream
1/2 teaspoon salt
1/2 teaspoon ground red pepper
1/2 teaspoon thyme

Making:

Saute the garlic and onions in the olive oil in a medium skillet for about 5 minutes. Stir in the tomatoes and simmer on low for about 20 minutes. Stir every one in awhile.

Stir in the whipping cream, salt, red pepper, and thyme. Simmer another 5 minutes or so, until it thickens.


Eating:
Cut a nice thick-ish slice of salt-rising bread and toast to a nice golden color. Oh that aroma- you'll come to love it. True confession time- I usually have two nice thick-ish slices. Lay your toast on a plate and spoon over a generous helping of tomato gravy. Arm yourself with a second fork to stab at people who are trying to steal your breakfast right off your plate. The gravy keeps well in the 'frig.


This came out smoother than normal. I generally like to chop the tomatoes
fairly coarsely so there are big pieces of tomato in the gravy.


I can't wait for the tomatoes to start coming out of the garden this summer so I can make this with garden-fresh, not store-fresh, tomatoes. Oh.......


Thanks for stopping by today. Have a great one and I'll see you next time.


Today's butterfly pic ...


Friday, February 24, 2012

Carrots- Not Just for Dippin' In Ranch


Photo by lillieinthecity via Flickr


Nope- no photo of the actual Curried Carrot Soup that I made the other night. We ate it way too fast to get pictures. So I'll use Lillian's photo of Carrot Soup, which has ginger. The recipe I'm going to share with you today doesn't have ginger. Sorry. But good news, it does have curry!


Before we get started today- I have chosen to "clean up" how I post. Tutorials are huge fun to work on and I love doing them but they are also time consuming. I don't have scads of spare time these days so I'll save the step-by-step photos for projects that would really benefit from such detail. That means unless it's something tricky, fun, or cool most recipes will be presented in a pretty straight-forward manner. Hope that's OK.


So-  let's get to the food!


I first got turned on to Carrot Soup after tasting my husband's at a favorite little bakery we like to visit. It was fabulous and right away I started researching and experimenting with Curried Carrot Soup. Most versions of carrot soup are fairly similar. My version of Curried Carrot soup is super easy and I hope you find it tasty as well.


You need:

3 tablespoons butter or olive oil- both are good
1 medium onion, chopped
2 pounds of whole carrots, cleaned, peeled, trimmed*
     You'll end up with about 1 1/2 pounds
2 cans of chicken broth- low sodium
1 cube of chicken bullion- I use the low sodium kind
1 - 2 tablespoons curry powder, depending on your tolerance for hot stuff
1/4 teaspoon ground cayenne pepper
Sea salt- about a teaspoon
1/4 cup plain Greek yogurt, optional but oh so yummy

*You can also use those cute little baby carrots but they will cost you a bit more. Just sayin'

Cut your carrots into about 3 inch pieces. Saute them with the butter and onions in a large Dutch oven until the carrots just begin to get tender. Add the remaining ingredients except for the yogurt. Simmer in the Dutch oven with the lid on for 15-20 minutes.


Puree small batches at a time in your blender or food processor. Careful- it will be hot! Once each batch is pureed, transfer it into a large bowl for safe keeping. See, you don't want to put too much in the blender at one time because when you hit the puree button, your ceiling will get a groovy orange tie-dye effect happening. Um, or so I've heard. Return the soup to the Dutch oven once everything has gone through the blender. Bring it back to a gentle simmer for a few minutes and then take it off the heat. Add the Greek yogurt and mix it in well. Once you ladle the soup into your bowls you can add a plop of yogurt. We have ours with a nice sturdy whole grain bread and a big honkin' glass of milk. Of course you can make this just fine without the yogurt but, again, of so yummy. And the yogurt helps cut the heat if you like a lot of curry.


Photo by roboppy via Flickr


I am not a big fan of cooked carrots but if you whirl them up with some curry powder, oh man! But I'm on a "curry bender" right now so even curry ice cream sounds good to me. No, I'm not pregnant.


Photo by tinatinatinatinatina via Flickr

I'm thinking that after all the years of gardening we've gotten enough of the rocks out of our garden patch to grow some nice straight carrots this summer. Mmmm- marinated carrots, hot pickled carrots, raw carrots freshly pulled from the soil.


Hey, thanks so much for visiting today. I hope you try the soup recipe and I'm always open to any suggestions for making it better. Have a great day and I'll see you again.


Carrot Moth photo by guppiecat via Flickr

Friday, September 30, 2011

Chuy's Creamy Jalapeno Dip. Maybe.


Image via BBC News


Way back in the Miami Vice days of the mid- 80's, I spent plenty of time at the original Chuy's Mexican Restaurant in Austin, Texas on Barton Springs Road. I was working for the city Parks Department and our office was in Zilker Park, just up the road from Chuy's. Great margaritas. Fabulous chili rellenos- my favorite, though the Chicka-Chicka Boom-Boom was pretty outstanding as well.


Anyway, Chuy's has this great Creamy Jalapeno Dip and you can imagine how delighted I was recently when I came across a recipe for it on 2 crafty r's. Now, this may or may not be the original recipe. I looked around a bit and some of the versions call for Ranch dressing, some for mayo (which I simply am not going to try because of my thing about mayo), and some call for tomatillos, which I might try because it's been so long since I've made anything with tomatillos. And to be honest, it's been a few years since I was in Austin and I just don't remember exactly, except that I liked it. So what the heck, this is the version I'm going to call home.


Gather up:

16 oz of sour cream
1 packet of Ranch dip mix
2-3 jalapenos, finely chopped (1/2 cup) *
2-3 cloves garlic, finely chopped*
1/3 cup fresh cilantro, finely chopped
Juice of a lime*
Milk, otional (I did not use since I like a thicker dip)

*I used canned jalapenos, though they aren't nearly as good, because I just can't be bothered with all the special precautions for chopping fresh jalapenos. I always forget and sear my eyeballs when I take my contacts out in the evening. An 8 ounce can equals 1/2 cup of j-peppers. I like garlic so 3 cloves it is. Finally, I used a couple squirts of bottled lime juice- not too much because it thins out the dip.


OK- now comes the really hard part. Pay attention here gang-


Mix the first 6 ingredients together. Add milk if you want. Serve with tortilla chips.


Whew! Take a break. Chips, dip, and a beer. Mmmmm- love me some Chuy's. This is best if you let is cool in the 'frig for a couple of hours so the flavors, especially the fresh cilantro, work together to create muy deliciouso happiness on a chip. And if you know beyond a shadow of a doubt that the original, real Chuy's dip is made with mayo--- please don't tell me.


Thanks for visiting today. Next time we'll do our birthstone for October. See ya then.


(Y'all have that Miami Vice theme song pounding through your head now, don't you?)

Sunday, September 25, 2011

No Bake Heaven


OK- I'm a sucker for chocolate cookies and bars. Honestly, cookies are my very favorite dessert. Right after ice cream. But ice cream is in a class all of its own and should always be understood, when speaking to me or to anyone from whom I am biologically descended, to be THE dessert of choice. But after ice cream, when we come back down to the mortal plane, are cookies. Homemade cookies- they must be homemade. Oh I'll snack on the occasional Oreo, Pecan Sandie, or the odd cookie made by Elves, but honestly, homemade is where I embarrass myself. Early in our marriage but far enough in for him to know my love of cookies, Big 'Un was totally astounded that I did not eat one single Chips Ahoy! from the bag he had brought home from the store. He loves those nasty things and thought he was going to have to hide them but, no danger there. I have no time in my day for Chips Ahoy! and most other cookies of that mass-produced ilk.


But these ....  oh ho ho, these babies are a little bit of no-bake heaven. Similar to the standard no-bakes (cocoa, peanut butter, milk, oats, etc), these sweeties come in bar form. I got this particular recipe from allrecipes but I've seen them around town in other places. Anyway, let's get crackin' so our lips can get smackin'


You'll need:


3/4 cup butter (allrecipes calls for 1 cup but I just can't do it.)
1/2 cup packed brown sugar- I like the dark kind
1 tsp vanilla extract
3 cups quick cook oats
1 cup semi-sweet chocolate chips
1/2 cup peanut butter- chunky or smooth but I like the chunky


Butter or spray an 8 x 8 dish.

Melt the butter in a large saucepan over low heat. Stir in the brown sugar, vanilla, and oats. Cook for 3 or 4 additional minutes. Keep the temp on very low so you don't have any scorching. Press half of the oats mixture into the prepared dish.


In a microwave safe bowl, microwave the chocolate chips and peanut butter, stirring every 30 seconds, until both are melted and smooth. In my microwave, this took a total of 1 minute 30 seconds. Pour the chocolate mixture over the crust. Save "some" to spoon over the top, if you would like.


Sprinkle the remaining oats mixture over the chocolate and press gently to form a top crust. Now drizzle the reserved chocolate over the top.


Refrigerate for 3 hours, or as log as you can take it, before cutting into smallish squares ('cause yes, a little goes a long way).


Smack lips, lick fingers. Yum.


And just to share, the entire time I was trying to take pictures of the finished cookies, this is what I had to work around ...


... because she knew that as soon as I was done, she was scoring some No-Bake Heaven and apparently didn't want to have to flick her tongue out too far.


So hey, it's been fun today. I know it doesn't seem like it but I do eat healthy food. I mean, ice cream is packed with calcium!


Thanks for fluttering by today and I'll see ya again.

Sunday, August 28, 2011

It's Summer So It's Slaw

I'm not so much a fan of most mayo-based cole slaws because it's so easy to go way overboard with the mayo. I like just enough mayo to hold things together a bit. I don't like my cabbage doin' the backstroke in mayonnaise while I'm trying to eat it.


With all due respect and acknowledging that we all have our own foodie quirks, no, I wouldn't eat this- I just can't get past all that mayo.
Image via Kitchen Scrapbook


Not a big mayo gal. Potato salad rarely- just the way my mom makes it (the kind with the vinegar, not mayo- I'll share it with you some time). Chicken salad only if the cook is extremely judicious with the mayo. Egg salad and macaroni salad- under no circumstances. Cole slaw- again, gotta go with mom's on this. Except that I have been trying out some new cole slaw recipes this summer. Red cabbage slaw- excellent. And this nice little recipe I tried recently from Taste of the South Magazine. I picked up a copy of their special edition for the summer, Southern Favorites, and that's where I got this recipe for Bell Pepper Slaw.


The magazine has a nice photo of the slaw in a jar and the directions actually say to mix it in a big glass jar. Well, my big glass jar is a plastic juice jug so I did this in a bowl.


Before we start, let me make a comment about the photos in today's post. I decided to blog this after I started making the slaw and since one camera was on the third floor and the other had a dead battery, I went with Hipstamatic on the iPhone. It was an experiment. Y'all are into that, right?


So, let's get this slaw under way. You need:


1 (10-ounce) bag angel-hair slaw mix
1 large red bell pepper, seeded and thinly sliced
1 large green bell pepper, seeded and thinly sliced
1 large orange bell pepper, seeded and thinly sliced
1 large yellow bell pepper, seeded and thinly sliced
1 large purple bell pepper, seeded and thinly sliced
1 cup grape tomatoes, sliced
1/3 cup olive oil
1/3 cup white-wine vinegar
1 tablespoon sugar
1 teaspoon kosher salt
1 teaspoon freshly ground black pepper
2 teaspoons dried basil
2 teaspoons dried oregano


The magazine instructions say to put the slaw, peppers, and tomatoes in a glass lidded jar and shake to mix. OK- well. I put them in my old faithful big white mixing bowl.


I could not find purple bell pepper so I used a quarter head of red cabbage.


Don't forget the tomatoes, though if I made this again, maybe I would. Depends on my mood.


Lots of colors for your plate with this slaw!


I did use a quart canning jar to mix up the dressing. Shake it up good and hard, then pour it over the veggies.


There you go- one colorful slaw.


What would I do differently? Well, this recipe makes up a great big batch of slaw- just so you know. Maybe leave one of the peppers out (I know, I know) or use half of each kind if you don't need to feed the entire army. The three of us ate slaw for a couple of days. I tried to slice the bells as thinly as possible and sometimes that turned out better than others but I think I would chop them up a bit. The long slices were somewhat cumbersome to get on the fork and into my mouth- maybe that's just me. And I'm sort of on the fence about the grape tomatoes- they are nice but this slaw would be fine without. Finally, the dressing seemed to need ..... something. Definitely use fresh basil and if not, add some good ol' slaw stand by- celery seed.


Oh don't get me wrong, it's a nice recipe and it made it onto the Keeper list.


Just look how colorful and visually pleasing it is on the plate, even with some of that garish Hipstomatic filter knocked back.


And my husband's grilled chicken ain't nothin' to sniff at either. So try this recipe- let me know what you think.


Gosh- can you believe we're winding down the to the end of our summer? Pretty soon I will start to see little groups of Monarch butterflies gathering in the yard slurping greedily at the feeder, stocking up, or short little trains of them flittering past on their way to Mexico. I wanna go too!


Thanks for alighting here beside me today- y'all know I appreciate each visitor to the jungle. See next time for a glass of milk. Oh, no wait, for milk glass.


Monday, August 1, 2011

Blueberry Zucchini Heaven


When I taste tested this bread, right out of the oven, I wasn't so sure the recipe, from All Recipes, was going to be a keeper. But we'll get into that in a minute. Click over to the recipe at allrecipes.com for the instructions. The ingredients are pretty straight forward- the usual bread ingredients plus our zucchini and blueberries. I did add about a half a cup of walnuts. Does that mean I can claim credit for an original recipe? Oh, well, just asking.


I'm not going to do an entire tutorial:  I frankly don't have that kind of time today and the recipe is linked above. So I guess that makes this more of a recipe review than anything else. As I mentioned, the "keeper" status of this recipe was initially in doubt. The bread, while fresh and warm from the oven, had an odd, almost tin flavor going on. Not wanting to jump to judgement on something like Blueberry Zucchini Bread, I let the bread cool. Ahhh- much better. We're thinking it was the blueberries that tasted "over the top" while the bread was still really warm. Slather on some butter or cream cheese and we're golden.


I had been thinking I would get the loaf out and try for some better photos than what I had quickly snapped off when the bread was first out of the oven. Then I looked over at my husband just in time to see him down the last bit of the bread. "You gotta make some more of this some time." He said, licking his fingers. Spending the night in the 'frig seemed to help the bread's flavors develop and it turned out to be a nice recipe.


Mmmm- look at those pretty blueberries and the lovely zucchini bits. Keeper!!

So get some zucchini out of the garden before they are as big as a car and bake up a couple loaves of this bread: one for you, one to share. Or two for yourself, it's your call.


Thanks so much for flittering by today. Be sure to flitter on back.

Tuesday, July 26, 2011

It's Too Hot To Make A Margarita

Boy! Have we been having some stinking hot weather! So when it gets really hot, I start thinking about margaritas.


Photo by Lumiago via Flickr
 
No, not Margarita daisies, though that does remind me that I need to get out and do some trimming. It also makes me remember that the nurse on duty when I had my Zippy was named Margarita. What a coincidence because that's how I got in that shape, I do believe....


Phtoto by Samantha Decker via Flickr


I'm not a big drinker and am happy with my couple of beers a week. But I do like tequila, especially in the summer when it is so blasted miserable hot. I really got to jonesin' for a margarita a couple of days ago but I would have to get out of the pool, put on shoes (OK, flip flops), walk to the garage, drive to the liquor store for mix in that hot ol' SUV, deal with the weirdo who works there, drive back, read the directions, find a glass, open the tequila.... by that time I would have been in the throes of heat stroke. So I made do with what I had on hand.


Tequila. I'm not a Patron Silver kind of gal. I much prefer any kind of gold and aged tequila but like I say, I had to make do.


Lime sherbet. OK now- work fast if you're making this in the sun on a day with a heat index of 105 degrees. Good Grief.


Introduce the tequila to the sherbet. Not much, just a little shot.


Then just mush it around with a spoon and enjoy. How easy is that?


OK kids, that's it---  stay cool and be careful 'cause it's a scorcher out there. See ya next time.

Friday, June 24, 2011

Hummus Among Us- Black Bean Hummus


The other day I was talking to a lovely woman from Lebanon and naturally we were soon talking about food. She is such a genteel soul, one of those people who are classy without ever trying, but she was clearly, in the most ladylike manner, disgusted with me for not making my hummus by first soaking the dry garbanzos, then cooking, etc. She assured me several times that it is easy to do, which I'm sure it is, but she's retired with no children at home and sets her own schedule in life. I go with canned garbanzos. Except for this recipe, which I've had forever and of course do not remember where I got it. I suspect it came from a magazine. An Internet search revealed countless sites with the exact recipe so I'm not sure to whom I should give the attribution.


You need:


1 - 15 oz can black beans, drained, reserve the liquid
2 tbsp lemon juice
1 - 2 cloves garlic
2 tbsp tahini
1/2 tsp cumin
1/2 tsp salt
1/4 tsp cayenne
fresh cilantro, to taste, optional


OK now, pay very close attention to these complex instructions:


Put everyting in a blender and whirl to consistency you like. Use the reserved juice from the beans to thin if needed.


Whew! Now sit down and take a break before you go receive rave reviews from your dining companions.


This recipe doesn't make much as you can see by the photo- one lunch for two or three (or just me but those black beans kill me the rest of the day). I generally serve this in a pita pocket with lettuce, tomatoes, cukes, etc. or in a Flat Out, though the hummus tends to squirt out the bottom if you're not careful. It's also good as a dip with some nice whole grain crackers or some veggies. Oh, you know what to do with hummus. Go get you some and enjoy.


Thanks for stopping by today. I really appreciate you visiting The Jungle.

Saturday, May 14, 2011

Precious Fruit Salad

It's been some time since I've posted a Fruity Fun Friday and even though today is Saturday, let's go with it.


I was in the produce section of the grocery store this past week and I guess it was the one day of sun we've had since March but I was feeling all spring-y. The outcome of that was that I was throwing fruit into my cart like a greedy, gluttonous maniac. Oh, we like fruit at our house but this was different. I was like Gollum, from Lord of the Rings, cradling fruit to my heart, hissing "Yes, my precious. My beautiful precious berries. They can't have you, my precious." Seriously, not kidding. It was pitiful but the fruit and the weather were so good that to be honest there were several other folks there whispering sweet nothings to the cantaloupe and strawberries.


Once I secreted my precious fruit in the refrigerator at home, it was time to mix. Mixed fruit salad, that is. This is so easy-


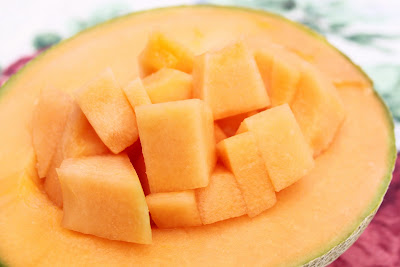
Cantaloupe- one half, cubed

(Cantaloupe is one of those things that I never think will go with berries, but oh...)


Blueberries- one pint


Strawberries- one pound, leaves cut off, quartered


Blackberries- one little package (what is that, half a pint?)


Bananas- two, sliced


A splash or two of lime juice to preserve the bananas.


Rinse, cut fruit, mix in a bowl.


Mmmm, my precious fruit salad.