Pages

Wednesday, December 29, 2010

New Year's Resolution


The top New Year's Resolutions, year after year, according to USA.gov, are:

•Drink Less Alcohol
                                                  •Get a Better Education
                                                  •Get a Better Job
                                                  •Get Fit
                                                  •Lose Weight
                                                  •Manage Debt
                                                  •Manage Stress
                                                  •Quit Smoking Now
                                                  •Save Money
                                                  •Take a Trip
                                                  •Volunteer to Help Others

If you click here you can visit the site and check out the links provided for each resolution. There is a ton a helpful and enlightening information for each resolution.


I'm not one for New Year's Resolutions. I know my limits. Approximately 30% of New Year's Resolutions are abandoned within the first week, and a full 97% are never achieved at all. I fall somewhere in that continuum.


via The Wardman Wire


But it is helpful to set a goal that is realistic and personally meaningful. Those are the keys to achieving success- realistic and meaningful. I gave up trying to lose 20 pounds this year (it wasn't a New Year's Resolution) and instead focused on losing 1 pound. And you know what? I did it! AND, I've done it 10 times now. No, not the same one pound ten times- ten separate, independent pounds. It has taken 10 months but I'm not complaining. I'm the tortoise of weight loss!


But it's been quite some time since I've made a true New Year's Resolution. Instead, a few years ago I made a Life Resolution. Sometimes- let's be honest- things just stink. I'm not talking about the big losses and heartbreaks that happen in life- that's an entirely different post. I'm talking about the ka-gillion events and situations in life that simply stink and over which we have zero control. But what are you gonna do? Wallow in it?  Refuse to be happy? Let it define who you are? Do you want to be known as the complainer?


via Cartoonstock.com

Zippy and I had one of our "big conversations" the other day and the title could have been "Things Are What You Call Them." We were discussing attitude and I was telling her about a dear friend who has a not-so-dear habit of calling every little bump in the road, every unexpected or unplanned blip, a disaster. Generally, they aren't disasters. Clean up the spilt milk, re-schedule the appointment, get the tire fixed, pay the late fee-- whatever. But it's not a disaster. Someone else got your dream job, your kid didn't win the cross-country meet, you don't like the new benefits package your work is providing. Why let that define you? Get over it.


I've gotten to the place in my life where I've figured out that life is hard enough sometimes without reinforcing the difficulties, without collecting and saving the memory of those difficulties. I try to let it go, even though that has not been an easy road to travel. I like to get my way and I'm a fretter by nature. Worry, fret, stew, stress. It's been a twisty path of re-learning my responses to life and I rely a good bit on my faith to get my over each bump and around each curve. Well, I have to rely completely on my faith because I can't do this on my own. And my faith gives me a reason to be happy, to move forward.
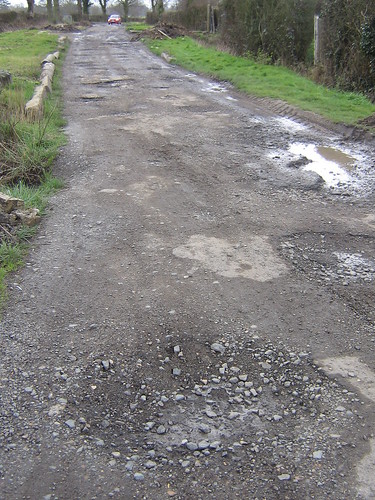

Potholes
by Gregory Williams via Fickr


Don't get me wrong, there are some truly crushing events in life that make it difficult to move forward. But not impossible. And don't you think that how we respond to the smaller disappointments and loses in life gives us practice for the bigger ones?


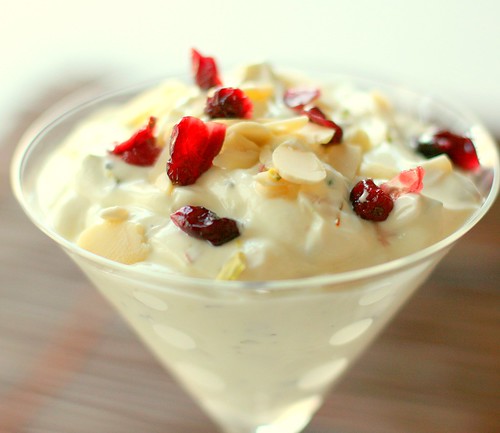
So my Life Resolution has been to be happy in spite of it all. I don't mean that we have to be a Pollyanna (that's not realistic) but after awhile you begin to see that there really are things to be happy about: your kid ran their personal best in the cross-country meet, it's good to have a job, your husband may not do laundry but he comes home to you every night, the milk may have spoiled but the yogurt it delicious.


Yogurt Dessert Shrikand
by qlinart via Flickr


So I issue not a New Year's Resolution but a challenge: look for one small thing today (remember, we're keeping it realistic and meaningful) that isn't so bad after all or something that turned out better than expected even though you expected it to be pretty bad. Look for something than is a pleasant counterpoint to and gives relief  to whatever frustrations you feel: a sparkle of sun on the snow, the flash of a cardinal at the feeder, the great wacky fun your kid had while dumping all the beans on the floor.
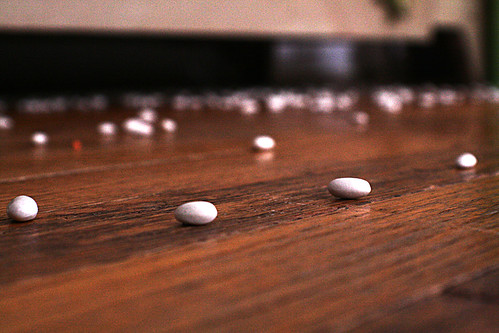

Beans Have Been Spilled
by ericarhiannon via Flickr


Just stop-
          take a deep breath-
                                 and say "Oh well."


And then do it again tomorrow.


I wish you a peaceful and happy new year.

Anyway.


Saturday, December 18, 2010

Lefsa


When a load of potatoes are put on to boil in my mother's kitchen and the lefsa griddle comes out, you know it's beginning to look alot like Christmas. Though lefsa is eaten year round, for us, and many Norwegian-American families, it's an annual Christmas season tradition to gather in someone's kitchen and make lefsa. It's a relaxing afternoon because there is a certain amount of time spent waiting for things to cook so there's lots of easy-going conversation.


Germans have brautwurst, Mexicans have tortillas. The Thai have sticky rice, Australians have vegemite and Norwegians have lefsa.


Lefsa, or lefse, is a traditional Norwegian flat bread made primarily from potatoes. There are a few different kinds of lefsa- thick, thin, crispier, soft- and countless recipes. Unlike fruit soup (click here), lefsa recipes do vary across regions of Norway in the way they are made and eaten. All version, however, are thin (or thin-ish) and made from potatoes.

Lefsa isn't hard to make though it does require some special equipment.


Ideally, lefsa is cooked on a lefsa grill. This is essentially a round electric griddle. In the past, we used a large round, flat pan on top of the stove. After my dad bought Mor the griddle, that pan seems to have disappeared.


You also need a rolling pin and a turning stick. If two people are working together, it's super handy for each person to have their own.


Your rolling pin should be a grooved pin, with the grooves running around the pin. This allows you to roll the lefsa thinner without air pockets and gives the lefsa its distinctive grid pattern. This results in the yummy texture of the cooked lefsa. You'll see in a minute.


The turning sticks are for, well, turning the lefsa as you roll it out and cook it. These were made from the slats that are inside the bottom "pulling end" of roller-style window shades. Just shape and sand smooth one end. Oh, those clever Norwegians.

potatoricer-2
by commonculinarian via Flickr Creative Commons

Finally, you'll need a potato ricer. The one you will be seeing us use here today has been loved much more than the one pictured above.


My mom- "Mor" in Norwegian- uses a recipe from her mom. I love my mom's recipe box. It's stuffed full of these cards, most of them written by my Mor with notes added over the years. At the bottom of this recipe, you can see where Mor added a note in 1962 after talking the recipe over with Grampa. There are more notes on the back.

 
Before we get to work, a note to all my Norske friends out there. I know that chances are your recipe is different. Even for lefsa that is supposed to be the same type, the variations are countless. But, like with the Fruit Soup, our recipe is the right way to make lefsa. OK, you know I'm kidding. It's just the way that I suspect my Grandma learned it from her mom, who learned it from her mom, etc for generations back into the wild and mysterious Viking times of Norwegian history. Your family probably just lived in a different valley than mine.

So, let's get going on the lefsa.


Grandma's recipe says you need:


12 potatoes
1/2 tsp shortening for every cup of riced potatoes
flour
salt


Let's talk potatoes. Mor says to use Russet potatoes. Idaho Russet potatoes are preferable as you need a potato that will cook up dry and mealy.

Mor also says not to use milk or cream as these will cause the lefsa to blister when cooking. They blister a bit anyway and as you will see they tend to blister a bit more when I'm stationed on the grill. It's just yummy that way to me.


Alright, let's get going....


Clean your potatoes by giving them a good scrubbing under running water.


Take out any bad spots and cut them into quarters.


Cook them (covered) in a large pot with the skins on and just enough water to keep them from sticking. Add a dash or two of salt.


While the 'taties are cooking, admire Mor's sweet arrangement and the herb starts in her window.


Then the potatoes are fork tender, scrub out your sink really well and drain them right into the sink. OK- you can drain them however you like but this sure is easy.


Let the potatoes cool a bit- just until you can stand to hand them. You don't want them to be cold. Then peel them,


and push them through the ricer. Twelve potatoes will give you about 10 cups of riced potatoes.


For each cup of riced potatoes, add 1/2 tsp of shortening. We had 10 cups of riced potatoes so we added 1 Tbsp plus 2 tsp of shortening. Distribute the shortening around the potatoes instead of adding all in one clump in one spot. Doing so helps with getting it mixed in evenly.

Remember, Norwegians who may be listening and who make their lefsa differently, this recipe does not call for milk or cream.


Now add about 4 cups of flour and salt to taste and mix up the whole batch very well. You want a dough that is not too stiff and is easily handled. It should be just a bit- just a bit- dry and crumbly.


Now plop out some dough on a length of wax paper, shape it into a log, and roll it in waxed paper. Many folks will tell you that the dough should be formed into balls about the size of a tennis ball and chilled on a plate in the 'fridge. My uncle says to chill the dough overnight. Whatever, it all cooks up the same.


Anyway, we got five rolls. We just let it sit on the counter and cool its heels while we get everything together for the next step. About 5 minutes. Mor and I chilled one fo the rolls as an experiment while we worked on the others but didn't notice any appreciable difference.


You can roll the lefsa on a floured counter top but it works very well to roll it on a heavy, floured towel or pastry cloth. Mor has a round cutting board that she made a cover for out of a heavy weight muslin. It's just a circle with elastic around the edges to hold it onto the cutting board.


Working one roll at a time, cut a slice of dough about 2 inches wide or so,


 pat it out in your hand, (see, it's a ball!) and


... get to rolling. You want to roll it a thin as possible but not so thin it tears when you turn it. It's an art. Work back and forth and then turn the pin to roll perpendicularly. You'll get a nice cross-hatched texture. Keep your surface floured. In fact, if you don't end the day with flour over 99.9% of your kitchen, you haven't made your lefsa correctly.


Turn the lefsa with the turning sticks as you roll it out and then transfer to the grill. Turn it over once one side starts to brown up a little.


You can see the cross-hatching and some of the blistering texture. This recipe makes up about 40 lefsa. Give or take. And depending whether or not you count the ones eaten in the name of quality control. Well, somebody has to make sure it's fit to eat.


Cool the lefsa on a towel. Mor folds each piece in half and makes little stacks. Normally they are covered with waxed paper or another towel to keep them from drying out. I know, it doesn't really look like much, but that's some yummy stuff.


The most common way of eating lefsa is to spread it with butter, roll it up, and eat it just like that. This is called "lefse-klenning" and is how we usually eat ours. However, there are no rules for properly eating lefsa. Many people add sugar or preserves. You can add fish such as pickled herring or a raw fermented fish called rakfisk with onions and sour cream. Some folks add salami or maybe some sort of cheese. You can even dip it in the Fruit Soup. There's no right or wrong way- whatever gets you through the next 3 months of darkness to spring.


Making lefsa with Mor has always been not just a Christmas tradition at our house but a kind of right of passage, a grafting onto our family tree that goes deep into history and blossoms with love. It's a bonding. I've been running the grill for years but my older sister always got to do the rolling. Rolling is an honor. This year when Mor asked me if I wanted to roll, I choked. What if I messed up? I'm "of a certain age" now but still didn't feel grown up enough to roll. It somehow seemed so wrong for anyone but Mor or my sister to roll that I simply couldn't mess with tradition. I am the grill daughter, not the roll daughter.


Maybe next year.


Wednesday, December 15, 2010

Mamie Eisenhower's Fudge

I've seen Mamie's Fudge, Million Dollar Fudge, Crazy Mamie's Fudge, all sorts of names. There are also several different recipes under each name. After a bit of Internet research, seems that this particular recipe is Mamie Eisenhower's recipe, or is attributed to her. Where she got it from is anybody's guess. I found the recipe in a magazine several years back but it is also in the Eisenhower Archives (click here for their PDF and a quick way to print the recipe) as Mamie's Million Dollar Fudge. Mrs. Eisenhower's recipe quickly became popular after it was printed in several women's magazines and newspapers during her husband's presidency.

Mamie Eisenhower in her inaugural gown,
painted in 1953 by Thomas Stevens.
Public domain image via Flickr Commons

The story goes that President Eisenhower liked his wife's fudge so much that he called it her Million Dollar Fudge. Well, whatever, it's a pretty rootin' tootin' good fudge and sooo easy. No soft-ball stage, no beating until your arm goes numb.


Apparently, there was a Million Dollar Fudge recipe that circulated around in the mid-1900's the way the Neiman Marcus Chocolate Chip Cookie recipe did a few years back. I'll quote from SkaarupFudge.com:


"Fantasy Fudge" is probably the world's most popular fudge recipe. The folklore (there are very few reliable historical references for fudge) goes something like this... A candy company named “See’s Candy” made a fortune selling a wonderfully rich and fluffy fudge. It contained a “secret” ingredient known only by those who made it. The secret ingredient turned out to be marshmallows. The Marshmallow Fluff company had a very similar recipe on the back of each jar of Fluff. When Kraft Foods introduced Marshmallow Creme (not “cream,” spelled wrong intentionally) it included an easy “Fantasy Fudge” recipe which was a cleaned up version of the Million Dollar Fudge Recipe and called for Kraft Marshmallow Creme.
 

Skaarup Fudge, by the way, has a eleventy-gillion fudge recipes plus plenty of good fudge-making tips and information. Check 'em out.


Mmmm, all this talk about fudge ....


So here's what you're going to need:


4 1/2 cups of sugar
A pinch of salt
2 tbsp butter
12 oz can of evaporated milk - not sweetened condensed (too sweet!) 
12 oz semi-sweet chocolate chips- not milk chocolate
12 oz German sweet chocolate
2 cups marshmallow cream
2 cups chopped nuts

Notes: If you cannot find sweet chocolate, you can substitute 12 oz. of semi-sweet chocolate plus 6 tbsp of sugar or 12 oz. of bittersweet chocolate (without the extra sugar). And of course the nuts are optional- I've made it both ways and personally prefer with nuts but I'm not allergic.


This is a pinch of salt, with my pincers. Seems like alot, doesn't it? My understanding is that a "dash" is 1/8 tsp. and a "pinch" is just a bit less than that.


Before you start--

Decide on your pan to cool the fudge. This recipe makes a fair amount of fudge and I've found that the 9x13 pan called for in the recipe makes really thick fudge, which can be hard to cut into small pieces. Instead of halving the recipe (heaven forbid) or splitting between two pans, I line a deep cookie sheet with foil and spray with oil. So much easier to cut into reasonably sized pieces.


First--

Place the sweet chocolate, chips, fluff, and nuts in a large, heat-proof bowl.


Second--


Place the sugar, evaporated milk, butter, and salt in a large saucepan.


Boil for 6 minutes, stirring frequently almost constantly.

I start the heat out on low so that the sugar doesn't scorch and turn it up a bit once it's nice and liquid-y, just to get the boil started. BUT, turn it back down again once it starts to boil or it could boil right up out of the pan and all over your stove. Trust me on that. Plus I've found that it still boils along at a pretty nice bubble even on the lowest heat.


Carefully pour the very hot sugar mixture into the bowl with the chocolate and stir it all up until the chocolate is completely melted.


Did I mention that this is very hot? I mix the fudge together in a stainless steel bowl so use a towel to keep from frying off my fingerprints. Purists will cringe and cry out that glass bowls are the only way to go but my stainless bowls have worked for the past several years. You'll also want to be sure to scrape the sides as you stir since the fudge will start to harden and crystallize on the bowl as it cools. Just don't scrap out all the hardened fudge when you're turning it into the pan or there will be grainy bits in your fudge.


Scoop out the fudge onto the cookie sheet. Smooth it as much as you can and then just set it aside to cool. If you're impatient you can stick it in the 'fridge.


When the fudge is firm, I place a large cutting board over the cookie sheet and flip it over onto the cutting board. Peel off the aluminum foil.


I spray a pizza cutter with PAM and use that to cut the fudge. Go slowly as it's easy to drive all over the fudge and end up with a wide variety of shapes and sizes but with a bit a caution this is a slick way to cut the fudge. I store the fudge in a Tupperware container with waxed paper between each layer of fudge.


There you go-- serve with milk and Christmas carols next to the tree.


Until next time---