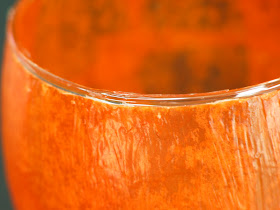
I was messing around trying to get a craft together for work the other day so I went with a tried and true project-- Mod Podge Anything! I know, this has been done- but I hadn't done it yet so away I went..
You need:
Small roundish candle votive
Orange tissue paper
Mod Podge
Black scrapbook or construction paper
Glitter glue in a bottle with a tip
Scissors
Wax paper
This perfectly shaped candle votive is from Dollar Tree.
(I know, I need to get a light box rig fixed up but my little Mom Cave play space just doesn't have much, well... space.)
Cut tissue paper into about 1 inch squares. No need to be exact.
Turn your votive over on the wax paper. This prevents the tissue paper and Mod Podge from lapping over to the inside, where it could conceivably catch fire. Safety First.
You know the drill... brush on the Mod Podge in one small area at a time...
lay on the tissue paper ...
and cover with more Mod Podge. I used the Hard Coat flavor Mod Podge for this project since the coated bottom will be in contact with surfaces like window sills, tables, etc. The Hard Coat flavor doesn't stick like the regular does at times.
Work your way around the votive until it is completely covered, overlapping the tissue squares as you go. Go ahead and add some extra patches and layers so that the orange doesn't fade when the candle is lit. Make sure to get the Mod Podge and paper all the way to the edge. It's OK if the tissue paper hangs over the rim onto the wax paper, just be sure to use your brush to get the paper up against the votive.
I used my CriCut to cut out little pumpkin faces but free hand is just as good. Glue the face onto the votive but remember that he is upside down. I realized afterwards that the face probably needs to be just a taddy bit higher. Lower? Closer to the rim of the candle votive. OK- now let him dry completely, upside down on the wax paper.
When your little pumpkin fella is dry he will peel right off the wax paper. But he will also have these raggedy edges. I used an exacto knife to go around the rim and trim all that off.
Neat and tidy!
Next I went around the edge with the glitter glue and gave him a nice sparkly trim. Let that dry completely.
And there he is!
Of course doing one design, one time, is never going to satisfy me so I conjured up a couple friends for him. The white ghost takes an extra good layer of white tissue so it stays white when lit instead of just looking frosty.
And a cat. Everyone needs a spooky little kitten at Halloween.
Once these were done I started thinking about the patients I currently have and this may be too fiddly, mainly because the tissue paper can be hard to see once you start coating it with the Mod Podge.
So, what to do ....
Check back tomorrow and I'll show you Take Two of the Halloween votives.


nice!
ReplyDeleteWhat a smart idea! Those look so cute!!
ReplyDeleteI love your blog, so many cute ideas!